tactical insertion
The Tactical Insertion returns, but this time the player can cancel the insertion between lives, which can be useful if an enemy is camping at the insertion just to kill the player upon respawning and to discourage Tactical Insertion Spawn Camping. In addition, it is now unusable in Free For All to prevent boosting.
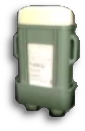
Placing the Tactical Insertion is less audible than in Modern Warfare 2, the beacon flashes red to enemies, but green to allies, once per second and has a fairly large area. In addition, it emits a low beep with every flash, making it easier to find. However, many players may mistake it for being part of the scenery, as many maps have flashing lights, therefore making it much less distinct than the bright flare inMW2.
Tactical Insertions can still be destroyed by any enemy player by hitting the "use" button in its vicinity, or by explosives. Firing on them can work as well.Flashbangs and stun grenades can also destroy them.


tactics:
It is generally more useful to use the Tactical Insertion in gametypes which requires defending an objective, providing respawns are enabled. It is useful to hide the TI in a corner or room away from enemies, who can destroy the flare, preventing the preferred respawn point. The flare is also commonly camped, and when you respawn, there will be someone waiting to say "hello" to you. When a Tactical Insertion is destroyed, a message will appear in the corner showing who destroyed the flare, along with a sound similar to the one when being stuck withSemtex. Placing a TI near an integral flag in Domination is an effective, and widely-used way to make the best use of it. Placing a flare near an objective in Demolition or Sabotage (although there is a respawn delay in the latter) can be effective in preventing enemies from defusing/planting bombs. Although there is absolutely no respawn use in Search and Destroy, as there is a message when a TI has been destroyed, placing one near an objective, and visually defending the other, a player can be alerted when an enemy is at the other bomb site - this only applies if the enemy is inexperienced enough not to know of the alert. A C4 is often more useful than doing this, as it has lethal capabilities. In Capture the Flag, it can be useful to place one before taking the enemy flag, but can be hindered by the respawn delay. TI's can also be used to hold down preferred positions in the map which may be difficult to get to, such as the roof on Highrise. This can sometimes backfire if the TI is seen. One problem with placing a TI in a room or beside a wall is that it can glow through the wall, which makes it obvious to enemies, and makes it more likely that it will be destroyed. The best place to put the TI is somewhere hard to access by enemies, but easy for the user, and also close-by, such as the bathrooms in the house in Estate. A more unorthodox way of changing classes is to place a TI, commit suicide, and respawn instantly again with the new class, in the same position.
Repeatedly placing a TI in the same position can be detrimental to a player/team's performance in killing-based objective games, as players will realize the position of the TI, and either camp or place a Claymore in order to achieve more kills.
Placing a Claymore on or next to a Tactical Insertion will kill a player who approaches it (either to knife it or smash it) or respawns in it. This can be used as a trap in two ways, either by placing one behind a friendly TI to trap enemies trying to knife it or smash it, or on an enemy one (to kill the player who respawns in there). The first tactic is better to use in a delay between dying and respawning (either in game modes with delay or waiting for the Killcam to end) allowing friendlies to shoot it if no enemy gets trapped. Traps like this can be countered by shooting either the Claymore or the Insertion. The player can also use other loadout to destroy it but that requires him to camp near the Insertion.
Some players prefer waiting until the enemy respawns where the Tactical Insertion was placed to get the kill.
A less common use is to drop a Tactical Insertion while defending a point in Headquarters. It will not help defending, but after the HQ is destroyed, a possible large cluster of enemies is likely to be nearby, and unsuspecting. It helps when battling for control of the HQ on large maps where the respawn points are dispersed.
Players have been known to wait by Tactical Insertion flares, hoping for a relatively easy spawn kill. 25 spawn kills from an enemy Tactical Insertion flare awards the "Tactical Deletion" (abbreviated TacDel) challenge and callsign title. Furthermore, SitRep makes Tactical Insertions show up red from any point in the map, even through walls. It is important to note that it takes about 3 seconds to light and drop the flare. During this time the user is defenseless against any attackers, but can cancel prepping the flare and switch back to their weapon. Tactical Insertion users can pick their flares back up to place them somewhere else if they so desire. Tactical Insertion flares can be destroyed by gunfire or manually by pressing X, F, or Square (Xbox, PC, PS3, respectively).
When respawning with a Tactical Insertion, one will be facing in the direction they were facing when they dropped the flare. Keep this in mind as not to drop on while facing a wall, only to respawn facing the wall with ones back to the enemy.
Killing an enemy within five seconds of tactically inserting five times completes the challenge Jack-In-The-Box I, unlocking the title by the same name. Jack-In-The-Box II requires 25 kills within five seconds of insertion and unlocks the Ta-Da! title. Jack-In-The-Box III requires 50 kills within five seconds of insertion and unlocks the Tactical Insertion symbol as an Emblem.
Tactical Insertions are very useful to snipers. A sniper can spawn at or near to their chosen sniper position. This is a risk however, as if an enemy player sees the sniper using the TI or placing it on the ground they will most likely wait for that person to respawn and kill them.
Another less common but useful approach to using a Tactical Insertion is to place it near a group of boosters and try to kill them. This way, if the player kills the boosters, the player can then pick up his Tactical Insertion and move on until the game ends, or the player finds more boosters. And if the player is killed by the boosters, the player can then respawn near the enemies and possibly take them by surprise.
One way to get easy Tactical Insertion kills without camping it is to place a claymore in front of an enemy TI if the player has one.
When a player is caught and killed after placing a tactical insertion, it is advised that they switch to a riot shield class as the enemy will most likely be waiting for the player to respawn to kill again.
When a player is sniping, using a tactical insertion as bait can be effective, as enemies will either try to destroy the insertion or wait for a player to spawn (for a easy kill).
Tactical insertions are also commonly used by boosters, generally paired with Cold-Blooded. For this reason, it is advised to equip SitRep whenever boosters are present, to find them easier.
In Black Ops, many players hold the Tactical Insertion while prone, which causes them to look like a dead body. This tactic is similar to double Y tapping in Modern Warfare 2, and is often used for the same things, such as ninja defusing.
